|
Trying to stem the southward thrust of the Japanese threatening to engulf the Dutch East Indies in February/March of 1942. The Battle of Sunda Strait
Introduction. 1. The Battle of the Java Sea. This battle has already been covered on AHOY in "Battle of the Java Sea, in which Exeter was sunk." It is the details of Exeter's Captain Gordon experience, written after he was taken a POW by the Japanese, he hid it in a hollowed out shaving cream tube, and after 3.5 years of captivity, after his rescue, these notes formed the basis on which he wrote his report of the Battle of the Java Sea, and the sinking of his cruiser HMS Exeter, for the Admiralty. Some Allied Naval forces make it through Sunda Strait.
From Alan Payne's HMAS Perth, published by the Naval Historical Society of Australia 1943 2. Battle of Sunda Strait. Problems with a supply of both oil and ammunition.
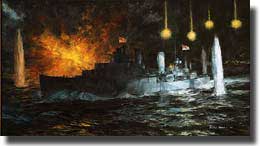
Dennis Adams painting: HMAS Perth in the Battle of Sunda Strait 28th. February 1942. Both cruisers were short of ammunition for their main armament, but nothing was available here at Tandjong-Priok, Houston had something like 50 rounds available for each of her 6 inch guns, and Perth but a meagre 20 rounds for each of her 8 by 6 inch guns.
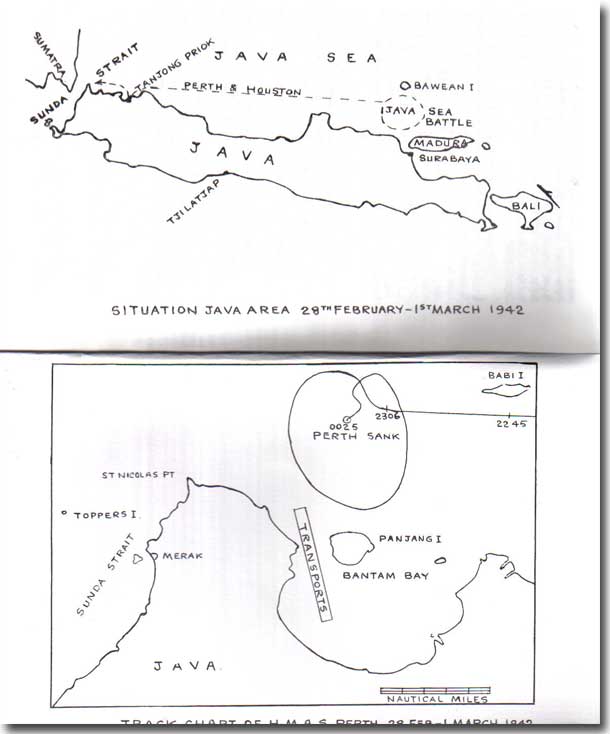
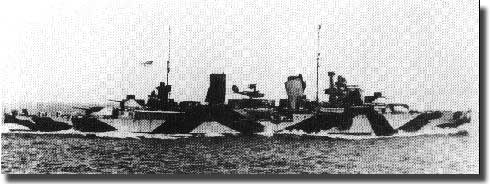
Australian light cruiser HMAS Perth, sunk at the Battle of Sunda Strait, 28th. February/1st. March 1942 The Dutch Admiral Helfrich in command, ordered these two cruisers with the Dutch destroyer Evertsen to sail for Tjilatjap on the south coast of Java. Dutch reconnaissance aircraft as late as 1500 ( 3 PM ) on the 28th. of February had reported the western route to Sunda Strait was clear of the enemy, they thought the Japanese invasion fleet was still some 10 hours away. At about 1900 ( 7 PM ) the cruisers proceeded to sea, Evertsen apparently did not receive any sailing orders and left an hour or so behind the cruisers, hoping to catch up, this Dutch destroyer seemed accident prone, but worse was yet to come. Captain Hec Waller RAN in Perth was the senior Captain, as a result of the reconnaissance report he decided to sail directly for Sunda Strait to hopefully escape into the wide embrace of the Indian Ocean. But unfortunately the report was not correct, the Japanese invasion force was already both sides of Sunda Strait, with a third group east of Tandjong-Priok, they had arrived about 4 hours ahead of their anticipated schedule. Both Perth and Houston were steaming straight for disaster.
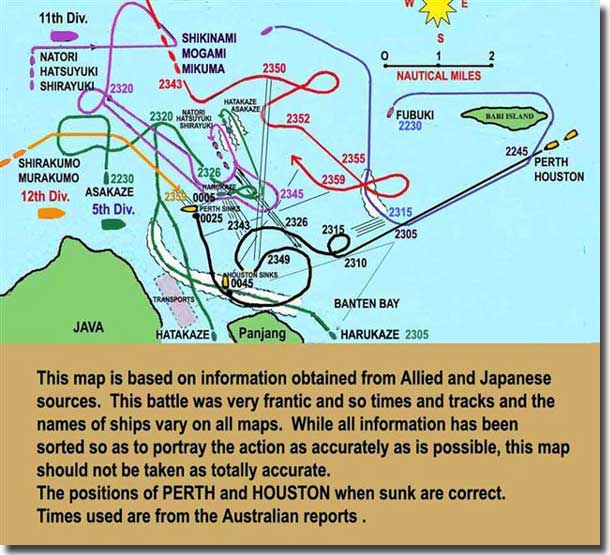
Battle of Sunda Strait map. The times are from Australian reports. The Japanese positions. The main group were off St Nicolaas Point, the western end of Java which delineates the eastern side of Sunda Strait, 6 transports went to Merak on the western side of the point, and another 27 transports landed most of the 2nd. Infantry Division at Bantam Bay which is east of St Nicolaas Point. The destroyers Harukaze and Hatakaze stayed with the main body of the transports in Bantam Bay along with the 1st. mine sweeping division, W1, W2, W3 and W4. The destroyer Fubuki patrolled the eastern approaches to Sunda Strait, and the two heavy cruisers Mogami and Mikuma, the light cruiser Natori, the 7 destroyers, Shiratsuytu, Shirakumo, Murakumo, Shirayuki, Hatsuyuki, Asakaze, and Ahikinami were all deployed in the vicinity of the anchorage. Beyond the potential battle zone and to the north were the light carrier Ryujo, the seaplane carrier Chiyoda, heavy cruisers Kumano, and Suzuya, screened by destroyers Isonami, Shikinamni and Uranami. There is no doubt that the Japanese held the high ground and all the risk rested with the two Allied cruisers. Action Stations. There was a full moon, a calm sea and visibility was also good, all set for a night battle. Houston leading Perth, as she rounded Babi, the lights of Point St Nicolaas came into sight, safety beckoned, but then the dark shapes of ships ahead loomed into view. Captain Rooks in Houston had been briefed that Dutch patrol boats may be seen, but these ships were moving too quickly, and he ordered " General Quarters." At 2244, Perth found Fubuki which had been quietly following on behind, and challenged her by blinker tube, the response was unsatisfactory, Waller decided she was an enemy and opened fire. The Battle of Sunda Strait was under way. Fubuki immediately made smoke, and let loose 9 long lance torpedoes at a range of 3,000 yards. The rest of the Japanese naval forces were in the main to the north and the west, now Fubuki steamed off to the north. The only shield for the transports in Bantam Bay were the two destroyers Harukaze and Hatakaze, and they were rather slow to react to the threat, at 2231 ( 10.31 PM ) Harukaze got moving and covered the bay entrance with smoke. She passed through the screen and steamed northwards. The two Allied cruisers neatly side stepped all of Fubuki's on rushing torpedoes, and resumed a course for the entrance to Sunda Strait.
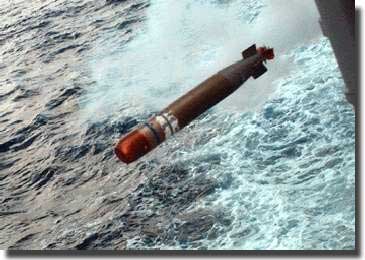
A torpedo just fired from its tube on the deck of a Destroyer, At 2252 ( 10.52 PM ) Hatakaze began to fire at the two escaping cruisers, to date they were the superior force, but that all began to change. Arriving from the north west, Shiratsuyu opened fire, the light cruiser Natori with Shirayuki and Hatsuyuki joined in the scrap, Asakaze had been north of St Nicolaas Point, she joined up with Hatakaze, and Harukaze some 2.5 miles east of the point. Shikinami and Murakumo were rushing from the west, but were still about 3.5 miles to the west of any action. It did not look healthy for the two Allied cruisers, who were about 5,000 yards east of the point and close to the transport area, they turned SSE at 2300 ( 11 PM ) and steered parallel to the transports for 8 minutes, and although still undamaged themselves they were able to worry the transports to a degree. When close to Penang Island at 2308 ( 11.08 PM ) Perth and Houston turned NE, at this stage, the largest of the Japanese light forces made up of Natori, Hatsuyuki, Shirayuki, Hatakaze, Asakaze and Harukaze were heading SE in three columns. Over a 9 minute period from 2310 ( 11.23 PM ) to 2319 ( 11.19 PM ) they swamped the waters around the Allied cruisers with some 28 torpedoes. The two cruisers were firing everything possible at their enemy, 8 inch shells, 6 inch shells, 50 calibre machine guns, and Perth fired off 4 torpedoes. Houston was the first to be hit, on her bridge starting a fire, Perth was still unscathed, but she was then hit three times, but continued to fire with her 4 inch guns illuminating the scene with starshell. Perth firing her 6 inch armament by independent control hit both Harukaze on her rudder, and Shirayuki upon her bridge. Now at 2319 ( 11.19 PM ) the Japanese heavies arrived on the scene from the west, each of them let go 6 torpedoes at Perth from a range of 9,300 yards, reversing their course as they closed Babi Island. The two Allied cruisers now turned towards St Nicholass Point, almost out of ammunition for their main armament, were they perhaps making a last lunge for Sunda Strait? At 2322, ( 11.22 PM ) shells from the Japanese heavy cruisers began to erupt all round Houston, illuminated by the searchlights from the accompanying Japanese destroyers. But now the end of this battle was nigh, at 2326 ( 11.26 PM ) Harukaze and Hatukaze squirted off 11 fish, to be quickly followed only 4 minutes later by another 18 torpedoes fired from Shirakumo and Murakumo, one torpedo probably emanating from Harukaze struck Perth in her forward engine room, killing al but one of the crew serving there. The 6 inch guns were left only with practice shells, and the 4 inch were down to starshell. Two further torpedoes truck home, most likely from Shirakumo and Murakumo, one hit the forward magazine, the second under X turret aft. Captain Waller ordered his crew to abandon ship, and a fourth torpedo hit struck home and the ship sank at 0025 on the 1st. of March 1942. Houston's time had come. The victims, the 9,162 ton Horai Maru, the 6,960 ton Tatsuno Maru, the 7,149 ton Sakura Maru, and the 8,160 ton Ryujo Maru, plus the Minesweeper W2, of 807 tons. All went down in shallow water, and both Tatsuno Maru and Ryujo Maru were later raised. At 2340 ( 11.40 PM ) Houston was hit in her engine room, all the crew therein died, a torpedo hit followed, but still she fought on, damaging three destroyers, Harukaze, Shirakumo, and Shikinami, a shell hit on her No 2 turret started up a fire, and both magazines were ordered to be flooded. Now three torpedoes struck home, and at 0025, Captain Rooks ordered ABANDON SHIP, a few moments later the Captain was killed by a shrapnel burst, as the ship was carrying too much way to allow the crew to abandon her with any safety, the Executive Officer Commander D. Roberts cancelled the Abandon Ship order.
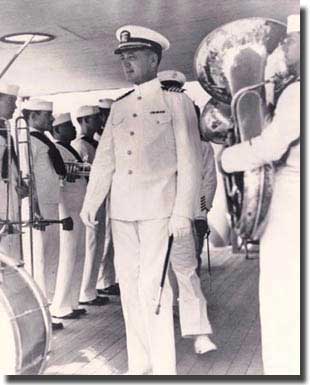
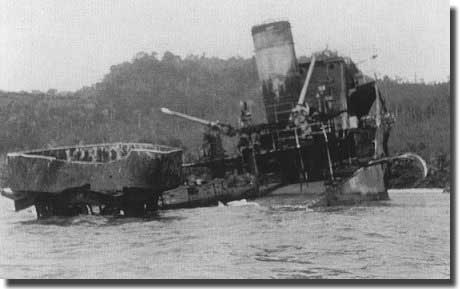
Captain Albert Rooks USN CO USS Houston, killed by shrapnel, The Japanese continued to pour in fire on the stricken cruiser, and finally at 0033 ( 00.33 AM ) Commander Roberts ordered ABANDON SHIP, in another 12 minutes she rolled over and sank. As the survivors struggled in the water to live, the US Ensign was still flying defiantly as their ship slipped below the waters close to Sunda Strait, they had been close to escaping the Japanese net, but unfortunately not quite close enough. Dutch destroyer Evertsen beached.
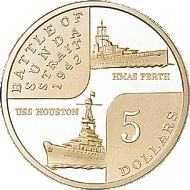
Dutch Destroyer Evertsen, beached on a coastal reef near Seboekoe Besar, Two of my Royal Australian Naval College term mates served in Perth. Conclusion. Both Captains Waller and Rooks died, of the 1061 who sailed in Houston, only 368 survived the action, and 77 of these died as POW's. From Perth's company of 681, 351 were killed in the action, a further 4 died ashore, of the 324 taken prisoner, another 104 died in captivity, the infamous Burma Railway project taking this awful toll, thus only 218 officers and sailors survived to finally come home at war's end in 1945. Commemoration $5 coin minted by the Australian mint to mark the 60th. Anniversary of the Battle of Sunda Strait.
|